How to create a post in WordPress
1. Add a new post
Step 1: Go to dashboard->Posts->All posts->”Add New” button at the top / “Add New” on the side bar
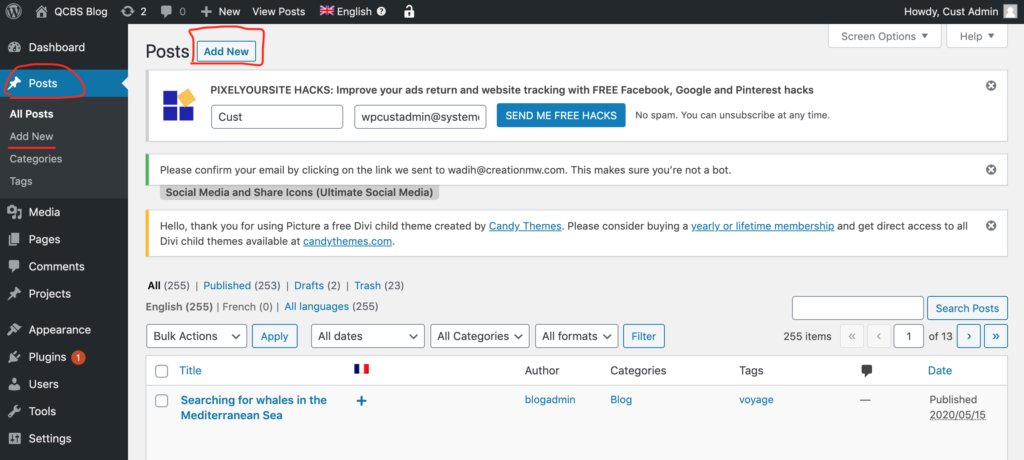
Step 2: Fill in the title and click “Use Default Editor”

2. Fill in the content
A post is consisted of many different blocks, to add a block you can click the button
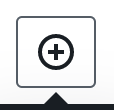
at the very top corner, here you may find all the available blocks you need for creating a post. For example, to add an image, Image block will help you and let you upload the source and adjust its position
Usually, like Tumblr, you might want to start with the author, by manually typing in the name starting with (par/by)
to add a link to the author, click “Link” button and type in the URL of the link, after pressing “Enter” the link URL will show up as the text, then select text and change to any alias you want. Double-check by hovering the cursor on the link and see if the link is correctly set.
In this step, everything is pretty much the same as normal post creation.
3. More settings
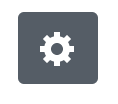
On the right side, usually a side bar is presented for different settings. If not you may toggle it at the topper right corner with the symbol
With different block selected, you may see the Block panel also shows different settings targeting the current block type, where you can customize your post even more.
Under the “Document” panel, you may find general setting for the whole post, here are some important setting that come to use in the future.
- Visibility: different setting for privacy and visibility, set it to private if you don’t want everyone to see it
- Publish: a timed publishment if needed
- Permalink: customize the URL if you want
- Categories: The categories are not used when it comes to sorting and characterizing the posts. Thus all the posts are of Blog category
- Tags: Tags are the ones used to categorize all the posts, similar to Tumblr. You may create more tags under Dashboard->Posts->Tags->Add New
- Featured images: featured images are not used for general posts, but for photo posts, you need to assign the photo to featured image and no need to include any image in the content, and also leave the title empty to achieve the same effect. (reference: https://lebeagle.qcbs.ca/blog/lebeagle-la-reserve-de-yasuni-en-images-par/)
- Excerpt: not set in general, so leave it empty is fine
- Discussion: setting for allowing comments or trackbacks
4. Publish
After finishing everything, at the topper right corner, you may click “Preview” to see the outlook without publishing, or “save draft” to continue later. After clicking “Publish” the post will show up on the website, but you may always go to Dashboard->Posts->All Posts and mange your posts.
If you want to hide any post, use tag “hidden” just like this post
0 Comments